Configure Spaces
A Spaces in Docq is associated with a single data source. Docq currently supports Azure blob containers. More data sources like AWS S3, Web scrapping, OneDrive, and G Drive. Let us know which data sources are most important to you, which will help us prioritise.
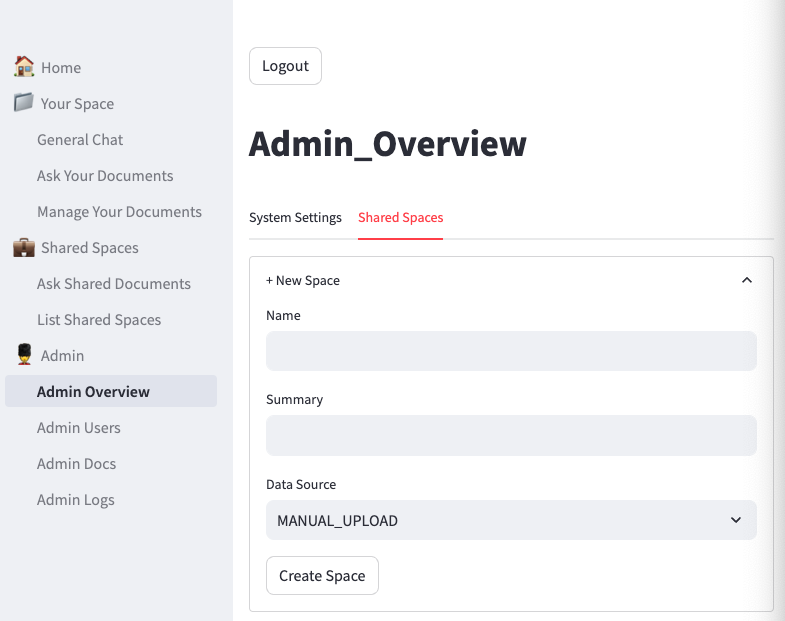
To create a space you need to have Admin privileges in Docq.
- Navigate to 'Admin Overview' > click the 'Shared Spaces' tab > click '+ New Space'
- Add a name that helps you easily identify the space.
- Add a summary with any additional details. This is helpful when managing several spaces.
- Finally, select a data source. Most data sources will require additional config which is data source dependent. Each supported data source has a section below with configuration details.
- Click 'Create Space' to complete.
At the moment, data sources other than MANUAL_UPLOAD require manually re-indexing by navigating to 'Manage Documents' and clicking the 'Reindex' button.
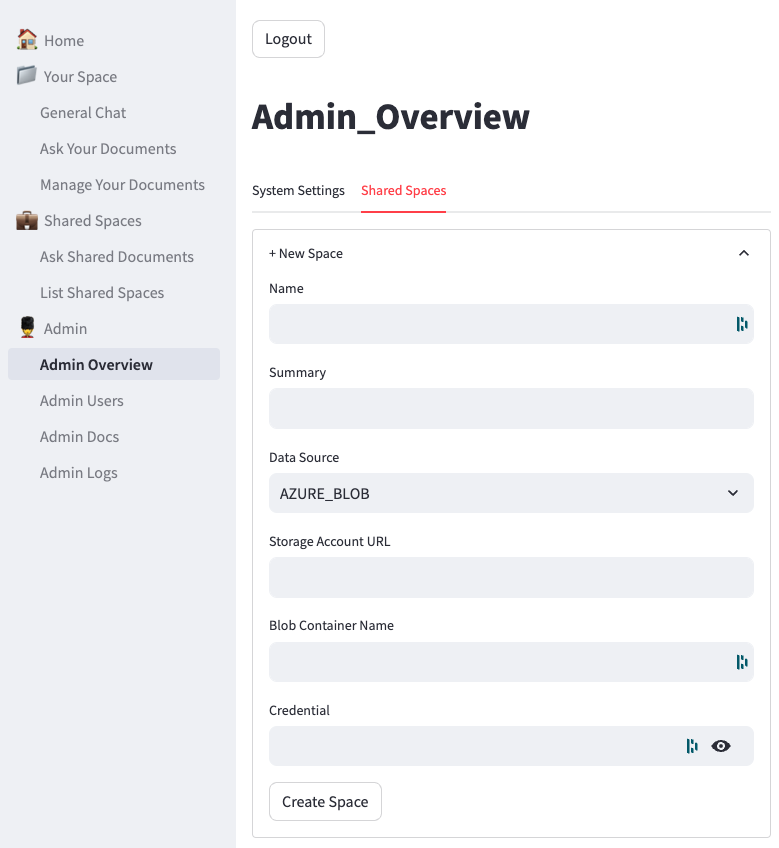
Data source: Azure Blob Container
Azure blob config screen in Docq
To get the values you will need access to the Azure portal where the Blob container is configured. If you don't have access, you will need help from your friendly IT admin or cloud infrastructure engineer that does.
- Login to the Azure portal with a login that has sufficient access to view (or create) resources in the Azure Storage Accounts service. Blob containers live under a Storage Account.
-
Navigate to 'Storage Accounts' then click on the storage account with the blob container you want to link to Docq.
-
Data Source:
AZURE_BLOB - Storage Account URL:
https://<Storage account name GOES HERE>.blob.core.windows.netreplace<Storage account name GOES HERE>with the value from the 'Storage account name' field in the Azure portal. - Blob Container Name: paste the container name here. It's shown in Storage account > Containers in the Azure portal.
- Credential - there are two types supported values:
- Access Key - This option gives broad access and might not be suitable in some situations. For example, if the storage account has other services and/or other containers with sensitive information.
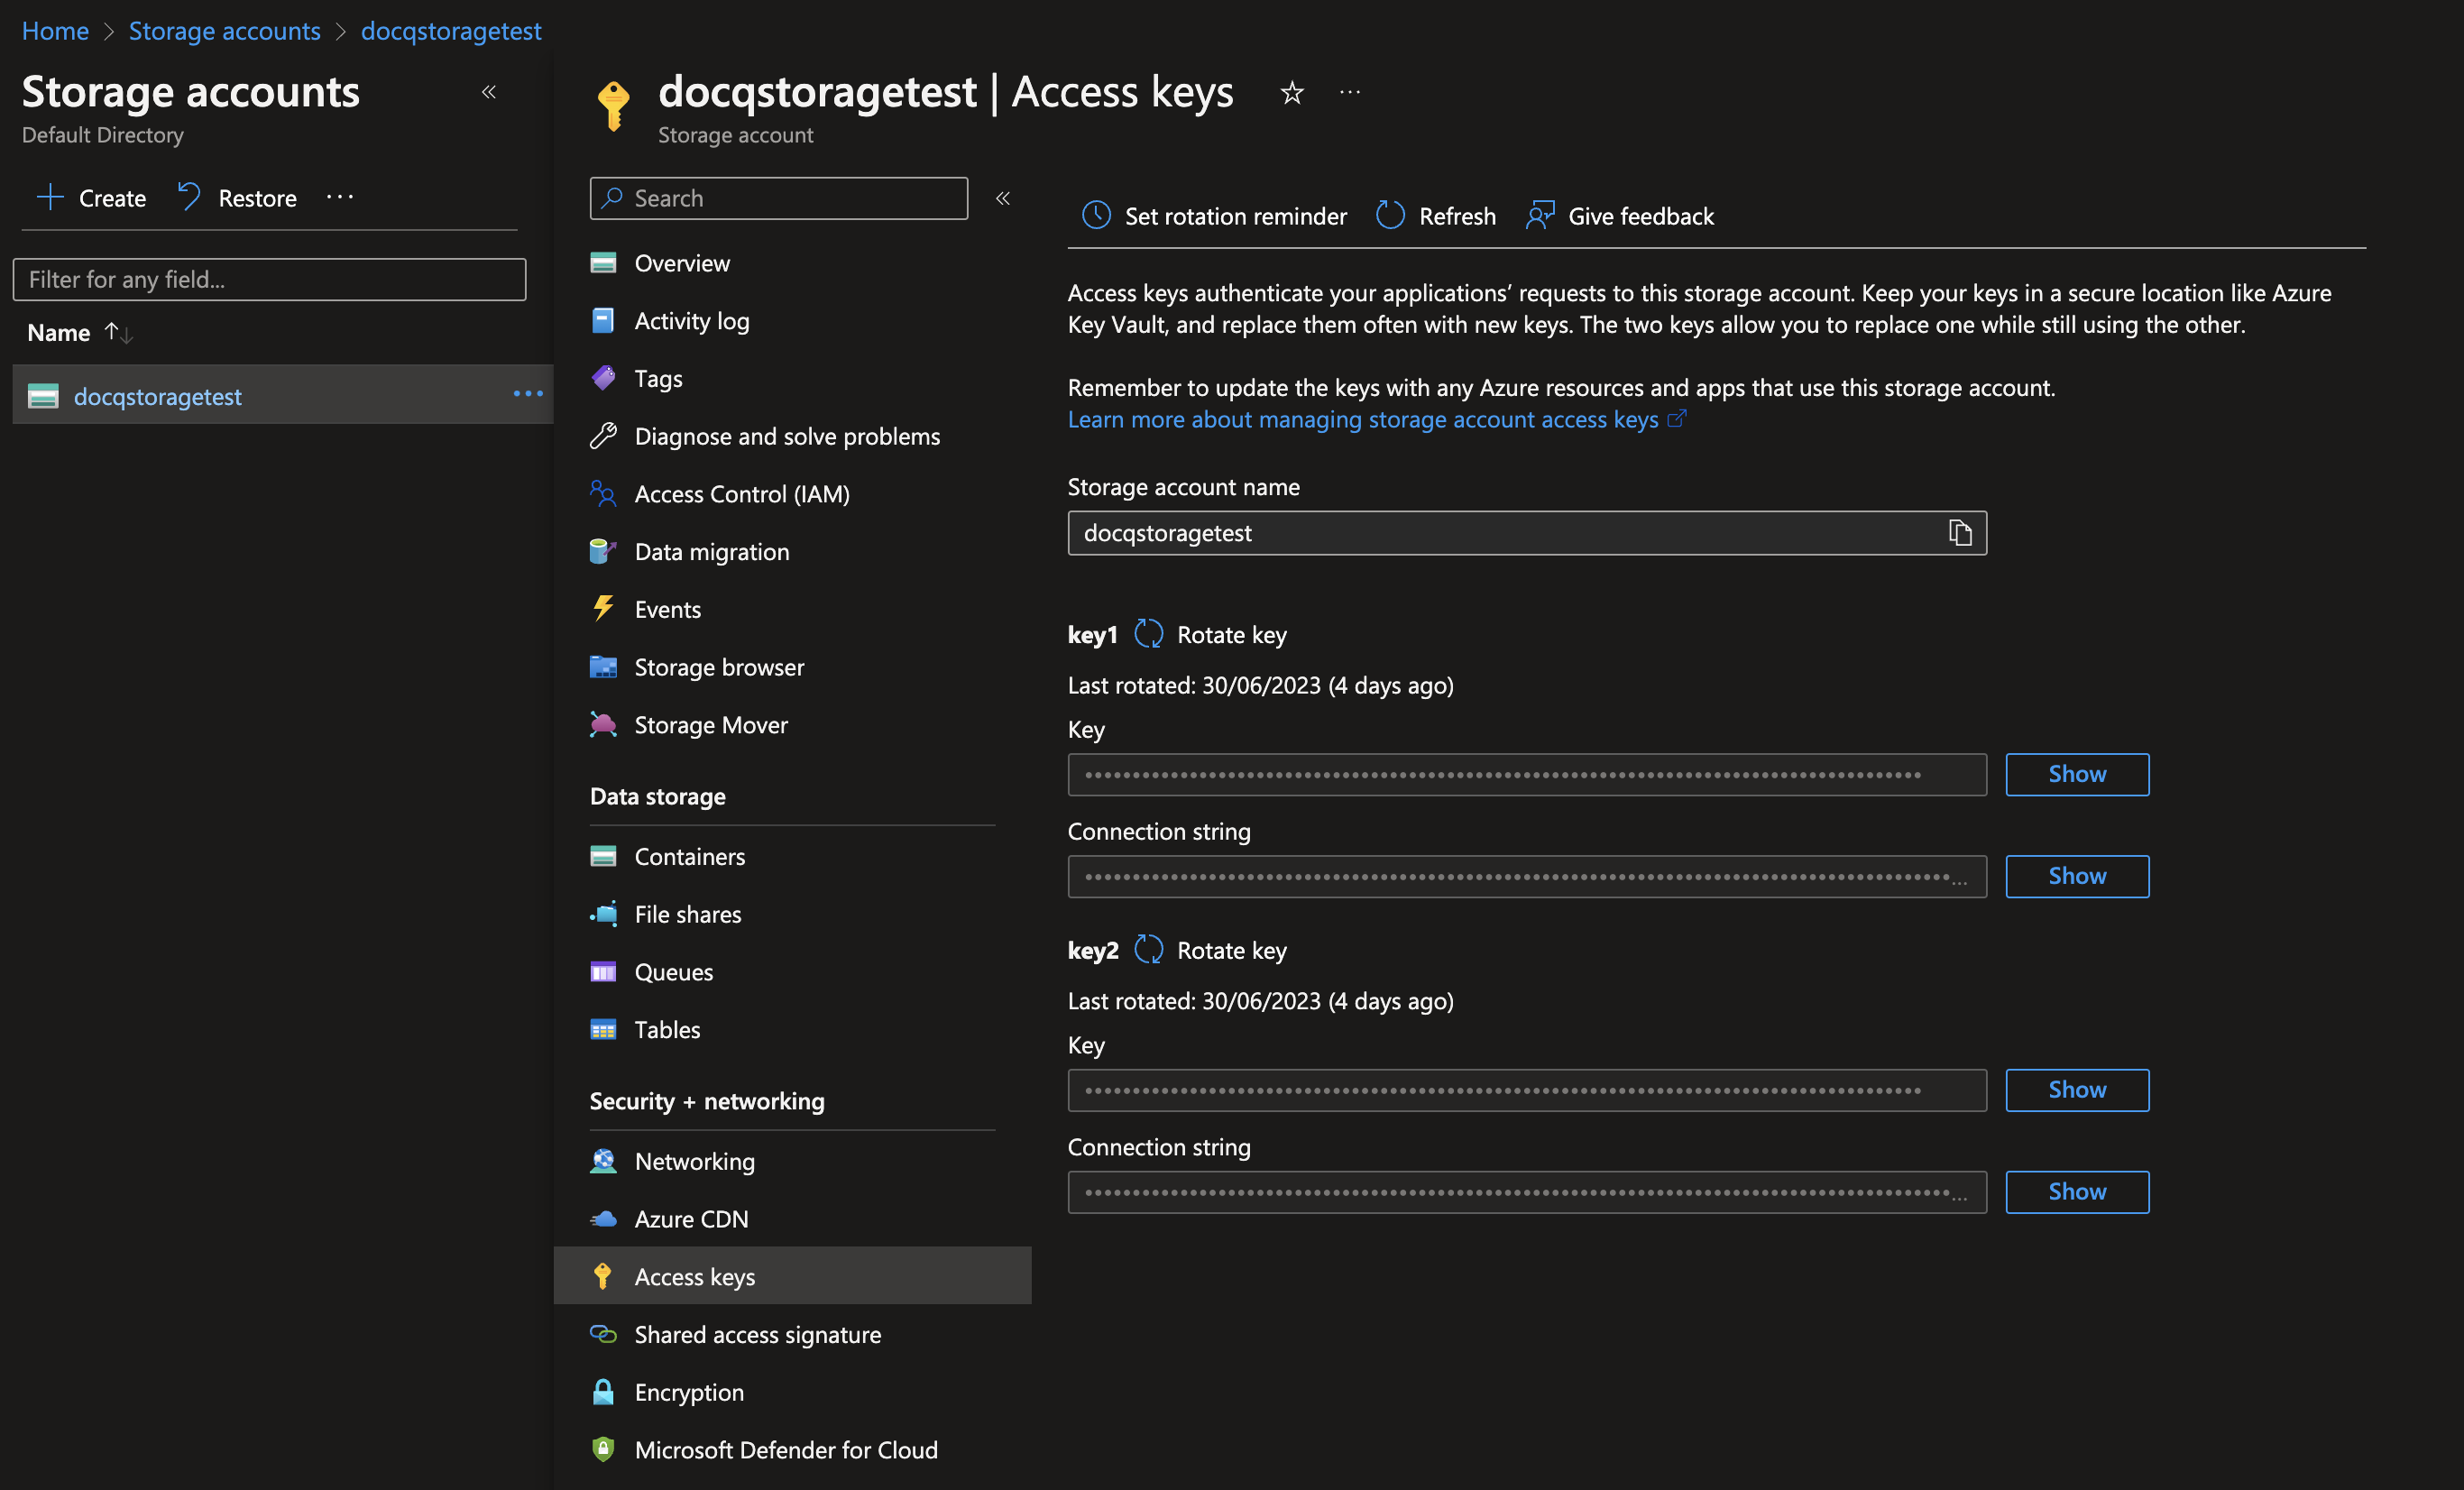
- from the 'Access keys' section, key1 > Key > click the 'show' button then copy button > paste into Docq
Storage account 'Access Keys' screen in the Azure portal:
Data source: Web Scraper
- Data Source:
WEB_SCRAPER - Website URL: The root URL with links to pages you want to in the space. Multiple URLs can be provided as a comma-separated list.
- Extract Template Name: type
readthedocs.ioordefault. - Include Filter Regex: only URLs that match this regex will be scrapped. Leave blank to scrape all links. Uses Python RegEx.
Data Source: Knowledge base Scraper
This one is similar to the WEB_SCRAPER but tuned to specifically handle knowledge bases type sites.
- Data Source:
KNOWLEDGE_BASE_SCRAPER - Website URL: The root URL with links to pages you want to in the space. Multiple URLs can be provided as a comma-separated list.
- Extract Template Name: type
GenericKnowledgeBaseExtractor. - Include Filter Regex: only URLs that match this regex will be scrapped. Leave blank to scrape all links. Uses Python RegEx.
- Title CSS Selector: a CSS class string that matches the element you want to pull title text from. Defaults to
. The value is added as metadata in the index hence tuning results.
- Subtitle CSS Selector: a CSS class string that matches the element you want to pull subtitle text from. Defaults to
. The value is added as metadata in the index tuning results.
Data source: Google Drive
- Data Source:
GOOGLE_DRIVE - Credential: Use the
Sign in with Googlebutton to access your Google Drive account. - Follow the on-screen prompts to sign in with your Google account, granting Docq read access to your Google Drive.
- The obtained credential is exclusive to the current space creation. Subsequent spaces will require a separate sign-in.
- Select a folder: Choose a folder from your Google Drive for indexing.
- Click the 'Select a folder' dropdown and pick the desired folder.
- Only root folders are supported for indexing; subfolders are not currently supported.
- Once the space is created, the selected folder cannot be altered. However, you can add more content to this folder and re-index it.
Data source: OneDrive
- Data Source:
ONEDRIVE - Credential: Use the
Sign in with Microsoftbutton to sign in with your Microsoft account. - Follow the provided instructions to grant Docq read access to your OneDrive.
- The obtained credential is specifically for the current space. Future spaces will require a fresh sign-in process.
- Select a folder: Choose a folder from your OneDrive for indexing.
- Click the 'Select a folder' dropdown and choose the intended folder.
- Only root folders are supported for indexing; subfolders are not currently supported.
- Once the space is created, the selected folder cannot be altered. However, you can add more content to this folder and re-index it.
Data source: AWS S3
Coming soon